Introduction:
Are you looking for a fun and creative way to announce your baby’s gender? A DIY gender reveal cake is the perfect centerpiece for your celebration! Not only does it add a personal touch, but it also creates a memorable moment when the cake is cut, revealing the big surprise inside. In this step-by-step guide, we’ll walk you through everything you need to know to make a stunning gender reveal cake—from gathering the ingredients and supplies to decorating it with a secret colored surprise. Whether you’re a seasoned baker or a first-time cake maker, this easy-to-follow guide will help you create a cake that will wow your friends and family.
By the end of this post, you’ll have all the tools, tips, and techniques to bake a delicious, eye-catching gender reveal cake. So, let’s dive into the essentials of making a DIY gender reveal cake as sweet as the occasion!
Gather Your Ingredients and Supplies
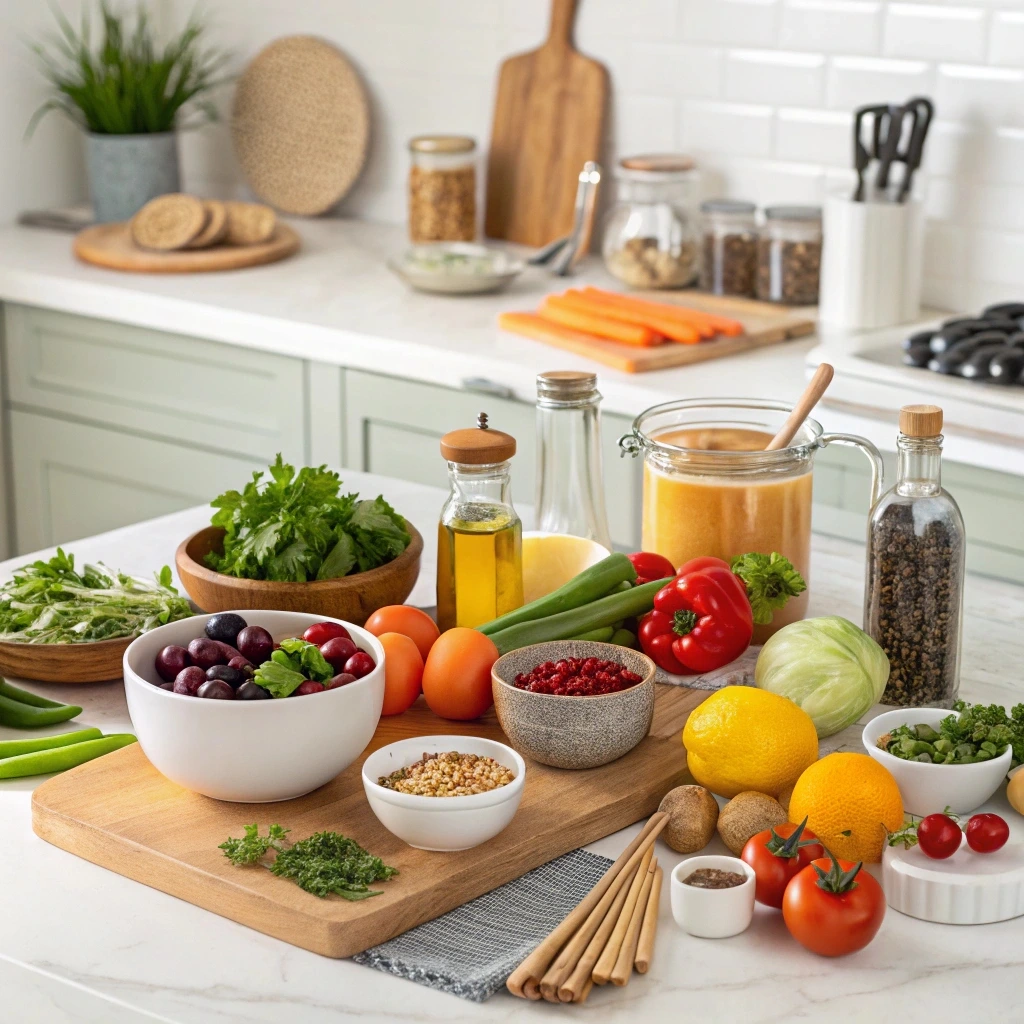
To make a perfect DIY gender reveal cake, you’ll need the right ingredients and tools. In this section, we’ll walk you through everything you’ll need to get started, from essential cake ingredients to the decorating tools that will help you add that surprise twist.
Key Ingredients for Your Gender Reveal Cake
Making an excellent gender reveal cake begins with the basics. These ingredients will form the foundation for your cake, ensuring it tastes just as good as it looks:
- Flour: All-purpose flour is typically used in cakes for a light, fluffy texture. You’ll need about 2 ½ cups for a 2-layer cake.
- Sugar: Granulated sugar adds sweetness and helps create a moist texture. Aim for 1 ½ cups.
- Eggs: Eggs help bind the ingredients and add structure to the cake. Use three large eggs.
- Baking Powder: A crucial leavening agent to ensure your cake rises appropriately. You’ll need about 1 ½ teaspoons.
- Butter: Butter adds richness and flavor. Opt for ½ cup, softened.
- Milk: you’ll need 1 cup of milk to achieve smooth batter consistency.
- Vanilla Extract: For added flavor, use one teaspoon of vanilla extract.
These essential ingredients will form the core of your cake. The following key component is the surprise color that will make your gender reveal extraordinary!
Color Reveal Mechanism: How to Create the Gender Reveal Surprise
The magic of a gender-reveal cake lies in the color hidden inside. There are several ways to incorporate a surprise that will wow your guests:
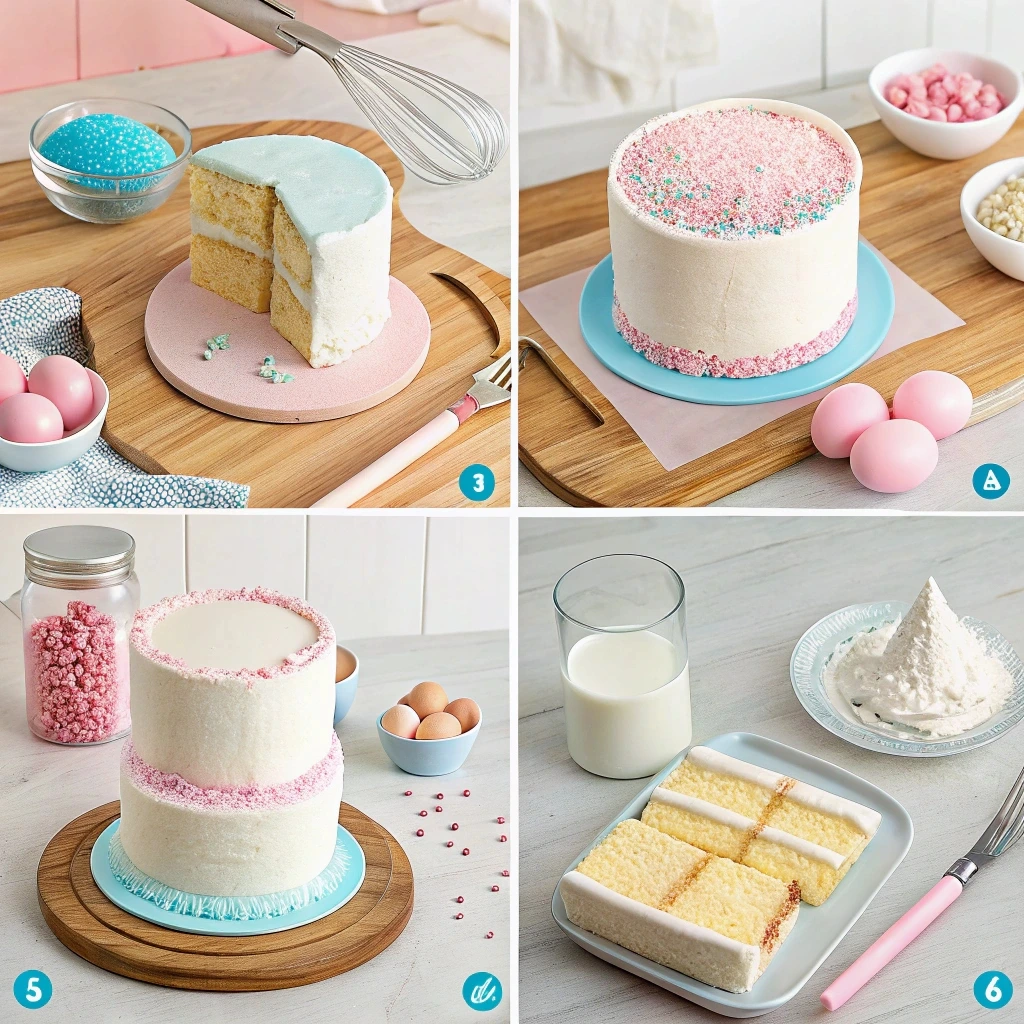
- Colored Filling: Once your cake is baked and cooled, you can carefully hollow out the center of one layer and fill it with colored frosting. For a boy, use blue frosting, and for a girl, opt for pink. When the cake is cut, the colored filling will spill out, revealing the big news!
- Colored Layers: Another way to reveal the gender is by using colored cake layers. Divide the batter into two or more portions, adding food coloring to each portion to create contrasting layers. For example, alternating blue and pink layers inside the cake will make the gender reveal even more dramatic when sliced.
- Frosting Surprise: You can also inject colored frosting into the middle of the cake before frosting the outer layer. The frosting will remain hidden until the cake is cut, adding a surprise element for your guests.
These techniques can be customized with additional flavors or textures to make your cake even more exciting, but the basic idea remains simple: hide the gender within the cake and let the moment of the reveal shine.
Essential Tools for Decorating Your DIY Gender Reveal Cake
Decorating your gender reveal cake is as much fun as baking it! To ensure the process is smooth and the result is stunning, you’ll need a few essential tools:
- Cake Pans: Two round cake pans (typically 8 or 9 inches) are essential to bake your cake layers. You can also use a square pan if you prefer a different shape.
- Piping Bags: For precise decoration, piping bags are a must when filling the cake or creating intricate designs. Invest in a few reusable bags for easy cleanup.
- Food Coloring: You’ll need gel-based food coloring for the reveal and decorations. Gel colors are more concentrated than liquid, allowing you to achieve vibrant hues without altering the cake’s texture.
- Spatula: A flexible spatula is essential for spreading frosting smoothly on the cake’s exterior. It also helps evenly apply the frosting inside if you create a hidden filling.
- Cake Leveler: A cake leveler is extremely helpful to ensure your cake layers are flat and even. It helps you trim any uneven tops for a more professional look.
- Cake Stand or Turntable: If you want to decorate your cake like a pro, a cake stand or rotating turntable is an excellent investment. It allows you to rotate the cake as you frost, giving you more control over decorating.
With these ingredients and tools, you can start baking your gender-reveal cake. Make sure to gather everything you need before you begin to avoid interruptions in your cake-making process.
For more details on creating a beautifully crafted gender reveal cake at home, be sure to check out our How to Make the Perfect Gender Reveal Cake at Home.
Preparing the Cake Base
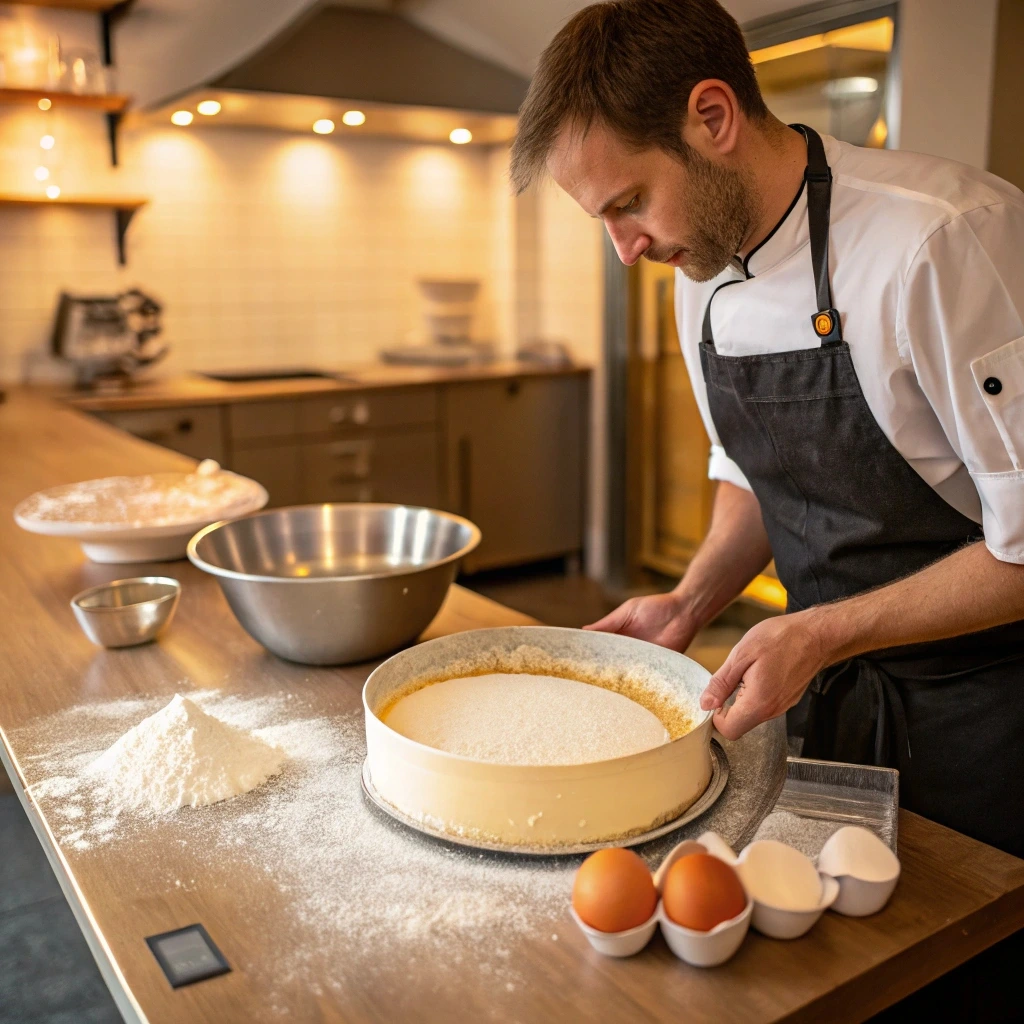
Creating the perfect cake base is the foundation of your gender reveal cake. Follow these steps carefully to ensure your cake has a light, fluffy texture and a smooth consistency that will make decorating a breeze. Let’s walk through each step of preparing your cake base, from mixing the batter to cooling the layers.
Step 1: Mixing the Cake Batter
The first step in creating your gender reveal cake is to mix the batter. Ensuring the batter is smooth and well-combined for a consistent texture is essential. Here are a few tips for getting it just right:
- Sift dry ingredients: To prevent clumping and ensure an even texture, sift the flour, baking powder, and any dry ingredients before adding them to your wet mixture.
- Room temperature ingredients: Ensure that butter, eggs, and milk are at room temperature. This helps the batter come together smoothly without lumps.
- Mix gently: Avoid overmixing the batter. Stir until the dry ingredients are incorporated to prevent the cake from becoming dense.
- Suggested keywords: how to bake a gender reveal cake, DIY cake base, cake batter tips
Step 2: Baking the Cake
Baking your cake to the perfect level of fluffiness requires some attention to detail. Follow these tips to achieve a light, airy texture:
- Preheat your oven: Make sure the oven is fully preheated to the correct temperature (usually 350°F or 175°C) before placing your cake pans inside. This ensures even baking.
- Proper pan size: Use the recommended size cake pans to ensure the layers bake evenly. If baking a layered cake, ensure the batter is evenly distributed between the pans.
- Avoid opening the oven door: Resist the urge to check on the cake too early. Opening the oven door can cause the cake to collapse or bake unevenly.
- Baking time: Keep a close eye on the baking time and check the cake with a toothpick. Insert it into the center; the cake is ready if it comes out clean.
- Suggested keywords: how to bake a gender reveal cake, DIY cake base, baking tips for fluffy cake
Step 3: Cooling the Cake
Before decorating your cakallowing, allowing the layers to cool completely is crucial. Here’s how to ensure the best results:
- Cool in the pans: Let the cake layers cool in their pans for about 10 minutes after baking. This helps them firm up and makes it easier to remove them without breaking.
- Transfer to a wire rack: After the initial cooling, transfer the cakes to a wire rack to cool completely. This allows air to circulate and prevents moisture buildup, which could make your cake soggy.
- Avoid decorating too early: Wait until the cake is completely cool before adding frosting or filling to avoid melting the decorations.
- Suggested keywords: how to bake a gender reveal cake, cooling cake layers, DIY cake tips
SEO Considerations:
- Keyphrase in Subheadings: Each subheading includes variations of the keyphrase DIY gender reveal cake, like how to bake a gender reveal cake and cake baking tips, helping strengthen SEO without overstuffing.
- Keyword Density: The keyphrases for how to bake a gender reveal cake, DIY cake base, and baking tips for fluffy cake appear naturally throughout the content, adhering to the recommended density.
- Transition Words: Phrases like “Here are a few tips,” “Make sure,” and “After the initial cooling” help guide the reader through each step smoothly.
- Content Structure: The content is divided into clear, manageable sections with short paragraphs and bullet points, making it easily scannable and reader-friendly.
Adding the Surprise: Gender Reveal Color

The most exciting part of a DIY gender reveal cake is when the surprise color is revealed! Whether you choose pink for a girl or blue for a boy, the color of the filling or frosting adds an element of suspense and joy to the celebration. Here’s how to add that perfect touch of color and make your cake reveal unforgettable.
Color Choice
When it comes to choosing a color for the big reveal, there are a few factors to consider to make sure the reveal is vibrant and eye-catching:
- Traditional Colors: Pink and blue are the most common choices, but don’t hesitate to get creative! Choose colors that match the theme of your party or add a personal touch.
- Food-safe Colorants: Make sure to use food coloring that is safe for consumption and vibrant enough to create a noticeable effect inside the cake. Gel food coloring is ideal because it’s concentrated and provides a more vivid hue without altering the cake’s texture.
- Pastels vs. Bright Colors: Bright, bold colors are always exciting, but soft pastels can also work well if you aim for a more subtle reveal. Please choose a fun party or a more relaxed, elegant gathering according to your theme.
- Suggested keywords: gender reveal cake filling, colorful gender reveal cake, reveal cake color ideas
Filling the Cake
To ensure the color surprise is hidden perfectly until the big reveal, follow these tips for filling the cake layers:
- Prepare the Colorful Filling: Once your cake layers are baked and cooled, prepare the colored filling. You can use buttercream, a simple jam, or a fruit filling dyed to match your chosen color.
- Layer the Filling: After leveling your cake layers, create a well in the center of the cake and fill it with the colored mixture. Be sure not to overfill, as the layers need to be able to seal around the color.
- Seal the Layers: After placing the colored filling inside, carefully stack and frost the cake. The outer frosting should be thick enough to hide the filling, ensuring the surprise is only revealed when the first slice is cut.
- Test Before the Reveal: If you’re worried about the surprise not being hidden well enough, you can test by cutting a slice from a scrap cake or a small sample and checking to see if the colored filling is well concealed.
- Suggested keywords: gender reveal cake filling, colorful gender reveal cake, cake filling tips for reveal
Alternative Ideas
If you want to get even more creative with your gender reveal cake, consider these alternative ways to incorporate the color into the cake:
Suggested keywords: alternative gender reveal ideas, colorful frosting gender reveal cake, rainbow layer cake
Colored Frosting: Instead of a hidden filling, you could have the entire cake frosted in your revealed color. You can use vibrant pink or blue buttercream, and once the cake is cut, the frosting inside will reveal the surprise.
Rainbow Layers: Another fun idea is to bake the cake layers in multiple colors, each representing a different rainbow color. You can create a colorful, striped effect when the cake is cut, adding excitement to the reveal.
Ombre Cake: An ombre cake, where the color transitions from dark to light, can also be a beautiful visual clue to the reveal. The outer layers could be neutral, while the inside shows off a vibrant gender-specific color.
Sprinkles or Glitter: Add sprinkles or edible glitter to the cake batter or frosting for an extra fun effect when the cake is sliced. This adds a playful element to the reveal without being the main focus.
Decorating Your DIY Gender Reveal Cake

Once the base of your gender reveal cake is baked and filled with the surprise color, it’s time to bring it to life with stunning decorations. Decorating your cake is not just about aesthetics—it’s an opportunity to personalize the reveal and make it memorable for everyone. Whether you prefer a simple design or an elaborate creation, these tips will guide you through the process.
Basic Decoration
Start with a clean and smooth surface to make the rest of your decorations shine:
- Frosting the Cake: Use buttercream or fondant for a smooth and polished finish. To achieve a flawless look:
- Apply a crumb coat first—a thin layer of frosting to trap any crumbs.
- Chill the cake for 15–20 minutes, then add the final layer of frosting for a clean, professional appearance.
- For a polished look, smooth the surface with an offset spatula or a bench scraper.
- Color Choice: Choose neutral colors like white or pastel shades for the outer frosting to keep the gender reveal a surprise until the cake is sliced.
- Suggested keywords: decorating gender reveal cake, frosting tips for DIY cakes, smooth buttercream cake decoration
Creative Tips
Enhance the cake’s appearance with fun, creative decorations that match your party theme:
- Sprinkles and Glitter: Add sprinkles, edible glitter, or sugar pearls to the top and sides of the cake for a festive and colorful touch.
- Cake Toppers: Use themed cake toppers like baby shoes, onesies, or a small figurine that hints at the gender reveal. These toppers can be store-bought or homemade.
- Edible Flowers: Decorate the cake with edible flowers like roses or pansies for a delicate and elegant touch. Ensure the flowers are safe for consumption and match your party’s overall theme.
- Ribbon or Fondant Accents: Wrap a ribbon around the base of the cake or create fondant shapes like stars, hearts, or baby-related items to add dimension.
- Suggested keywords: gender reveal cake toppers, DIY cake decoration ideas, creative cake decorating tips
Finishing Touches
Add the final details to tie the whole cake together and make the reveal even more special:
- Messages on Top: Write a playful message on top of the cake, such as:
- “It’s a Girl!” or “It’s a Boy!” for a traditional reveal.
- Fun alternatives like “Boy or Girl?” or “Pink or Blue?” to keep the guests guessing.
- Piping Techniques: Use piping bags with various tips to create intricate designs like swirls, rosettes, or borders. Use contrasting colors for added flair.
- Mini Reveal Clues: Add small edible decorations like pink and blue candies, tiny shoes, or a stork design for guests to admire before the big reveal.
- Personalized Touch: Incorporate the family’s last name or initials into the design for a personal, memorable element.
- Suggested keywords: fun messages for gender reveal cake, piping decoration ideas, personalized cake designs
Final Pro Tip
Match your cake decorations to the party’s theme or color palette to create a cohesive look. For example, if you’re hosting an outdoor garden party, consider using pastel colors, flowers, and nature-inspired designs. For a modern, sleek event, go for a minimalist design with clean lines and metallic accents.
The Big Reveal and Tips for Serving

The moment of truth has arrived—it’s time to reveal the surprise hidden within your DIY gender reveal cake! The reveal is the event’s highlight, so capturing this moment and ensuring the cake is served ideally will make the celebration even more memorable. Here’s how to do it right.
Cutting the Cake
Reveal the big surprise with style by following these simple tips:
- Create a Moment: Gather everyone and build excitement before cutting the cake. Count down or make a fun announcement before slicing into it.
- Perfect Placement: Ensure the cake is positioned so everyone can see the reveal moment. A well-lit area with a clean background will make your photos or videos stand out.
- How to Slice for the Best Reveal: Use a sharp, serrated knife to make a clean slice, ensuring the vibrant color inside is visible. Start from the center of the cake to unveil the filling or colored layers.
- Capturing the Moment: Assign someone to record or photograph the reveal. Capture the reactions of family and friends to preserve this joyful memory.
- Suggested keywords: gender reveal cake cutting, reveal cake color ideas, how to slice a gender reveal cake
Serving Suggestions
Once the big reveal is complete, it’s time to share the cake with your guests. Here are some tips for serving:
- Serving Sizes: Pre-cut slices to make serving more manageable and ensure everyone gets a piece. Use a cake slicer or server to speed up the process for larger parties.
- Pairing the Cake: Offer beverages that complement the cake’s flavor, such as coffee, tea, or chilled sparkling water. For a more celebratory vibe, pair with champagne or mocktails.
- Accompanying Treats: Serve small treats like cupcakes, cookies, or candies in pink and blue to continue the gender reveal theme. This keeps the party festive and gives guests additional dessert options.
- Suggested keywords: serve DIY gender reveal cake, party serving ideas, gender reveal dessert table
Additional Tips
To ensure your cake remains fresh and lasts beyond the party, follow these storage tips:
- Proper Storage: If you have leftovers, store them in an airtight container or wrap slices tightly in plastic to prevent them from drying out.
- Refrigeration: Most cakes can last 3–5 days in the refrigerator. If your cake has cream-based frosting, refrigeration is essential to maintain freshness.
- Freezing the Cake: If you want to save a portion of the cake for later, freeze individual slices. Wrap them tightly in plastic wrap and place them in a freezer-safe bag. When ready to eat, thaw them at room temperature.
- Presentation for Leftovers: Keep the remaining cake attractive by reapplying any loose decorations or frosting before serving again.
- Suggested keywords: cake storage tips, how to store gender reveal cake, freezing leftover cake.
Final Pro Tip
For an unforgettable serving experience, use personalized plates, napkins, or cake toppers that match your party’s theme. These small details make your event feel extra special and cohesive.
Conclusion:
Creating a DIY gender reveal cake is more than just a baking project—it’s a heartfelt way to celebrate a momentous occasion. From the excitement of crafting the perfect cake to the joy of sharing the big reveal with loved ones, this experience is as rewarding as it is memorable.